[ pfa ] [ acrr ]

Home |  Contact Us |  Computing |  Gardening |  Photography |  Railroading |  Potpourri
Home > Railroading > ACRR > The Story >

The Alville & Captown Railroad
The Story

Conception, Design and Construction

Genesis

In the beginning I was a gardener. In those early days it was not by choice, everyone in the family helped out. Later I became a model railroader. Then I found out that gardening and model railroading could be combined. Originally this started as a "just for fun" project spurred on by the gift of several copies of Garden Railways magazine from my brother, Frank. Later I thought that it should have a higher purpose. Considering the various skills needed and the end result I got to thinking about two important people in my life. So I decided that this project should be done to honor my father, a Signal Maintainer for the Soo Line Railroad, and my father-in-law, a Civil Engineer for State of Wisconsin. Both were Christians, family men, gardeners, woodworkers, hunters and fishermen. (These men never met each other as Dad died in 1958 and I did not meet my wife-to-be and her family until the mid 1960's.) A further purpose, the railroad provides a gathering place to have fun for family and friends. It is also a reminder of the people and industry that built many of the communities of this part of Wisconsin.

The Theme: A 1890-1940 Northern Wisconsin Logging Railroad
Northern Wisconsin was known for its extensive white pine forests. This resulted in a major lumbering industry with many sawmills in this area including what was once the largest sawmill under one roof just a couple of miles from where I grew up. (That mill was long gone before I came on the scene.) So the original theme for my garden railroad became a 1890-1940 Northern Wisconsin Logging Railroad. A sufficient reason to get a Shay locomotive. This theme was researched by reading several books from our local library and visiting our museum. I also purchased the book Minnesota Logging Railroads at the Scale Model Supplies hobby shop in St. Paul, MN. This book makes frequent mention of Wisconsin logging railroads. This research verified that Shays were used in this area. Several websites provided additional interesting information on logging railroads.
What's in a Name?
Every railroad has to have a name. It seems that a lot of them are taken from the regions or towns they served, especially the towns at the end points of the railroad. As I started a track plan I created two towns for my railroad to serve, so they needed names too. How about Alville for one; my Dad's name was Alfred but everyone called him, Al. There is even a real town near here on the Soo Line with a similar sounding name, Albertville, where Dad had to go to fix signals. My father-in-law's nickname was Cap so the other town became Captown. That sounds sort of like Capetown, but that is a long way from here. How about "Capville and Altown"? Naaah. So the railroad's name became the Alville and Captown Railroad.
Trains in the Garden, eh?
This is a garden railroad. So what is the garden environment like?
  • North edge of USDA Zone 4. Some maps put us on the southern edge of Zone 3..
  • Temperature range: -20°F to +105°F (I do remember a -40°F morning in the winter of 1964-65.)
  • Soil type: Sandy loam several inches deep over sand
  • Rain fall: Rarely over 1 in. per event
  • Snow fall: Rarely over 4 in. per event
  • Max snow depth: Rarely over 24 in. and decreasing (can you say "global warming'?)
  • Location: Central, south, and west side of back yard
  • Light: Full sun on the central area and south end, partial to full shade across the west side
  • Available space: About 50 ft north-south x 50 ft east-west
  • Grade: Pretty much level, ok it's flat but does slope down going from north to south, about 6 inches over 50 ft, that's a 1% grade.
  • Nearest electrical connection: Under center of deck
Layout Design
Several different designs have been on the drawing board, i.e., computer screen. I started with concept diagrams and later made some measurements of the space I had available so the drawings were close to being in scale with reality. I found some useful dimensions and other planning guidelines on the Web.

Here is the current track plan:

track plan

Equipment Selection
A logging theme pretty well narrows the equipment choices. A geared loco, like a Shay, and log cars make a good place to start, and of course that is what they used around here. There were other locomotives used besides Shays. With two towns there has to be some passenger service, too.

Logging Train

logging train
I took this picture shortly after I got the Shay and caboose. The track is all wood and dry compost serves as the ballast. I just had to get a picture of them.

Bachmann Shay

Shay loco
Ain't shay sweet?

Log cars log car  log car
Caboose caboose
Passenger Train

passenger train
A visit to the St. Aubin booth at TrainFest in Milwaukee and their store in Illinois provided the passenger train. Really cool looking at night as the coaches are lighted.

Bachmann 4-6-0 ten wheeler
Jackson & Sharp
Baggage
Combine
Coach
Observation

baggage car  combine car
coach  observation car

Power Distribution: Onboard Battery vs Track Power
Battery power with radio control seems to be the ideal combination. But I will start with track for power distribution because of its simplicity. Also, modifying the Shay for battery operation seems like a major task. The RS-3 will be easier to convert, a no brainer if I use a battery car. If visitors bring engines that need track power I'll be ready for them.

The end result was the purchase of the Aristocraft 27 MHz Train Engineer and the Elite Switching Power Supply. I have added a second receiver and transmitter pair since I have two loops.

Rail Type Selection: Brass vs Stainless Steel vs Aluminum
Brass is readily available, less costly that SS, easily soldered, and easily bent. The major drawback is oxidation requiring cleaning. Use of battery power for the train minimizes this problem. I have seen little mention of aluminum and there is a problem of electrolysis when used with dissimilar metals such as copper or brass.

Got some Aristocraft brass track and switches, some new, some used on eBay and elsewhere. It looks well made. I also got some Split Jaw Rail Clamps to use where ever I put switches in the track. This was recommended on the Aristocraft forum. Switches need occasional maintenance so the clamps will make removal and replacement easy.

Layout Construction
Fall 2005. There was a lot to do and a lot to learn about how to do it. So construction is being done in multiple phases. This spreads the work, the materials acquisition and expenses out over an extended time. Besides, this is a hobby, not a job, so go slow and enjoy it. I began construction of trestle. Phase one work was largely delayed until spring due to early wintery weather. We had snow and rain with below freezing temperatures so the ground was hard to work.

In mid-winter I ran across an article on the Web about pond siting. One statement in it said, "For all the work that goes into building a pond, you should put it where you can see it from the house most of the year". That made good sense. So I moved pond on the plan and also the location of the towns. This was a whole lot easier than digging a new pond and filling in the old one. Planning is a good thing to do. This was almost like starting over. I'm glad I did not get more construction done.

I volunteered to have my garden with an operating garden railroad around a pond on the tour for the North American Lily Society International Lily Show in July, 2006. A fixed deadline, July 15, for lots of projects.

Spring, 2006. Construction of the layout itself was preceded by 2 related projects, replacing the concrete in the driveway and building the pond. The old concrete from the driveway was used to construct a retaining wall to hold dirt excavated from the pond and build the stream bed that will feed the pond. It was also used for the construction of 2 tunnels for the train. Some dirt from digging the pond was used for fill in the driveway. About 600 marigolds were raised from seed in my green house and planted in the gardens and flowerbeds around the yard.

Summer, 2006. The pond was dug and lots of garden and flower bed work was completed. Next some track was laid. Many thanks to Margaret, my wife, and friend Lars for helping. 1 July, 2006 arrived quickly. Roadbed for the loop around the pond (the Captown loop) was started. On 14 July 2006 the first train was running. Only one problem was encountered - two pair of wires ran from the power supply to the track as 2 loops were planned but only one constructed at this time. I hooked up the wrong pair to the first loop. A quick swap of the wires and the train sprung to life. The tour was the next day. About 130 people visited. Most had never seen a garden railroad before.

On 9 August 2006 construction of the Alville loop began. The next day trains were running over the Alville loop with a temporary connection to the Captown loop.

Fall, 2006 was the construction of the Alville loop extension around the pond. 28 Sept 2006 marked the beginning of the roadbed preparation. On 10 Oct 2006 the grade crossing installed. People and the lawn mower need to safely cross the tracks. Someday signals will be installed here. Some snow fell in October but progress continued. Track was laid and the Alville extension was completed and operating. 24 Nov 2006 the Alville station siding is in place. By the end of November the Alville tunnels were completed except for portals.

Winter, 2006-2007. A wooden truss build bridge, the first of at least 3 bridges was built. Some of the boys in my Royal Ranger Outpost came to run trains and have a hot dog roast. To add to the fun I built several prototype buildings out of cardboard. These were industries so we could do some realistic switching.

Spring, 2007. Some landscape with plants around the pond and on and around the hills through which the tunnels pass was done. Also some finishing of areas of track that was laid earlier was done.

Summer, 2007. This brought the lengthening of the Alville loop along the west side and to the north. Construction of the train shed has started.

Fall, 2007. Finished most of the trainshed and Alville loop north extension.

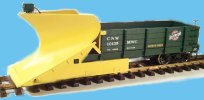
Winter, 2007-2008. Built a short a deck bridge. Started building a rotary snowplow.

Spring, 2008. Installed bridge between the tunnels.

Summer, 2008. Extended the Alville loop north extension farther north.

Winter, 2008-2009. Built a prototype turntable of all wood. Final version will be made of composite plastic-wood material to stand up to rain and snow. Built 3 more tunnel portals.

Spring, 2009. Finally got the ridge cover on the train shed. Turntable was installed as were the new tunnel portals. Plastic rail was installed in the trainshed for storage tracks. Electrical panel for power control to the trainshed tracks was installed. A real door replaced the 1x8 board that was being used.

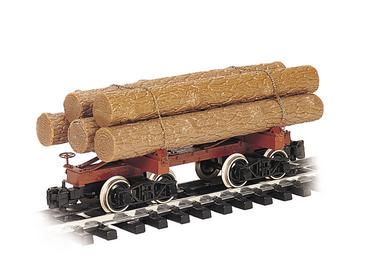
Summer, 2009. Added a 2 track siding for the logging camp area and a track that runs through the trainshed.

The Theme Expanded
Late in 2005 I was browsing the Aristocraft Trains website. It was among the first of many visits. Aristocraft was offering an RS-3, 40 ft box car, and long steel caboose in Soo Line livery to those who wanted to join the Aristocraft Club. I pondered that offer for a few days, wondering about spending the money and also the fact that I had planned a logging theme for the railroad.
Freight Train Freight Train
Aristocraft RS-3 RS-3
Box Car
Gondola
Caboose
Snow Plow

box car  gondola car
Caboose  snowplow

You may remember from the first paragraph of this story that my Dad had worked for the Soo Line. As a result I have an interest in that line. Well, I mentioned to my wife that this offer existed and even showed her the pictures on the website. Her comment was something like "Go for it". Who am I to refuse encouragement like that?

Before the year was out she decided to join the AC Club, too. Now we are the proud owners of a pair of Soo RS-3's, box cars, and cabooses. That fueled my interest in 1:29 scale models. An assortment of 1:29 locos, steam and diesel, and rolling stock appear on the new standard gauge ACRR. At other times it is still an old narrow gauge logging railroad. You may even see trains from both eras running at the same time. Kids certainly don't mind, and neither do I.

The logging theme will continue but I'll be adding more modern era equipment for logging. I have started to acquire a number of box cars with road names that serve as reminders of various places we have visited. For example, the Alaska Railroad and the New York Central.


[ Top ]


[ Home ] Paul Almquist
©[copyright date]
Valid HTML 4.01! Last update: 2009-09-18 03:06:18